Una pettorina per cani è una buona alternativa a un semplice collare e guinzaglio se sei l'orgoglioso proprietario di un cucciolo un po' troppo eccitato. I cani che tirano il guinzaglio possono ferirsi accidentalmente a causa del collare che esercita una pressione eccessiva sulla parte anteriore della gola. È noto che alcuni cani dispettosi tirano o si liberano dal colletto durante le passeggiate. Un'imbracatura aiuta a correggere entrambi questi problemi.
Detto questo, le pettorine possono essere più difficili da indossare rispetto ai collari. E poiché esistono diversi tipi di pettorine per cani, può essere ancora più complicato capire come adattare correttamente la pettorina. In questo articolo spiegheremo come indossare i 3 principali tipi di pettorine per cani in modo che tu e il tuo cucciolo possiate godervi di nuovo passeggiate senza stress.
Indice
- Indossare un'imbracatura standard
- Indossare un'imbracatura con clip frontale
- Indossare un'imbracatura step-in
- Imbrigliare un cane – Considerazioni finali
- FAQ
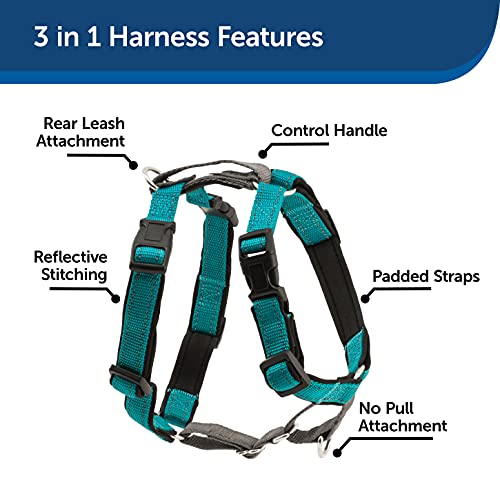
Indossare un'imbracatura standard
L'imbracatura standard è probabilmente il miglior punto di partenza. Questo è il tipo più comune di imbracatura, quindi se non sei sicuro del tipo di imbracatura che hai acquistato, è probabile che sia questa.
Puoi riconoscere una pettorina per cani standard dal posizionamento dei due passanti: uno che gira intorno alle costole e un altro intorno al collo del cane. Vedrai anche un anello a D che si trova sulla schiena del cane. Qui è dove agganci il guinzaglio.
- Passo 1: Quando il tuo il cane è calmo, posizionati dietro di loro in posizione seduta, accovacciata o in piedi.
- Passo 2: Prendi il più largo dei due anelli e mettilo delicatamente sopra la testa del tuo cane, seguito dal secondo anello più stretto. A questo punto, l'anello a D dovrebbe essere in cima alla schiena del tuo cane.
- Passaggio 3: Prendi una delle zampe anteriori del tuo cane e guidala nel foro della gamba in modo che il tuo cane abbia una gamba tra il collo e gli anelli delle costole.
- Passaggio 4: Allacciare l'imbracatura utilizzando la fibbia o il fermaglio. Questo dovrebbe fissare l'altra gamba del tuo cane nel passante della seconda gamba. Se le due metà della fibbia non si raggiungono comodamente, regola la cinghia fino ad ottenere la vestibilità perfetta.
- Passaggio 5: Una volta allacciata la pettorina, controlla che non sia troppo larga o stretta su nessuna parte del corpo del tuo cane. Se riesci a inserire due dita sotto ciascun anello ma non riesci a far passare l'imbracatura sopra la testa, è perfetto.
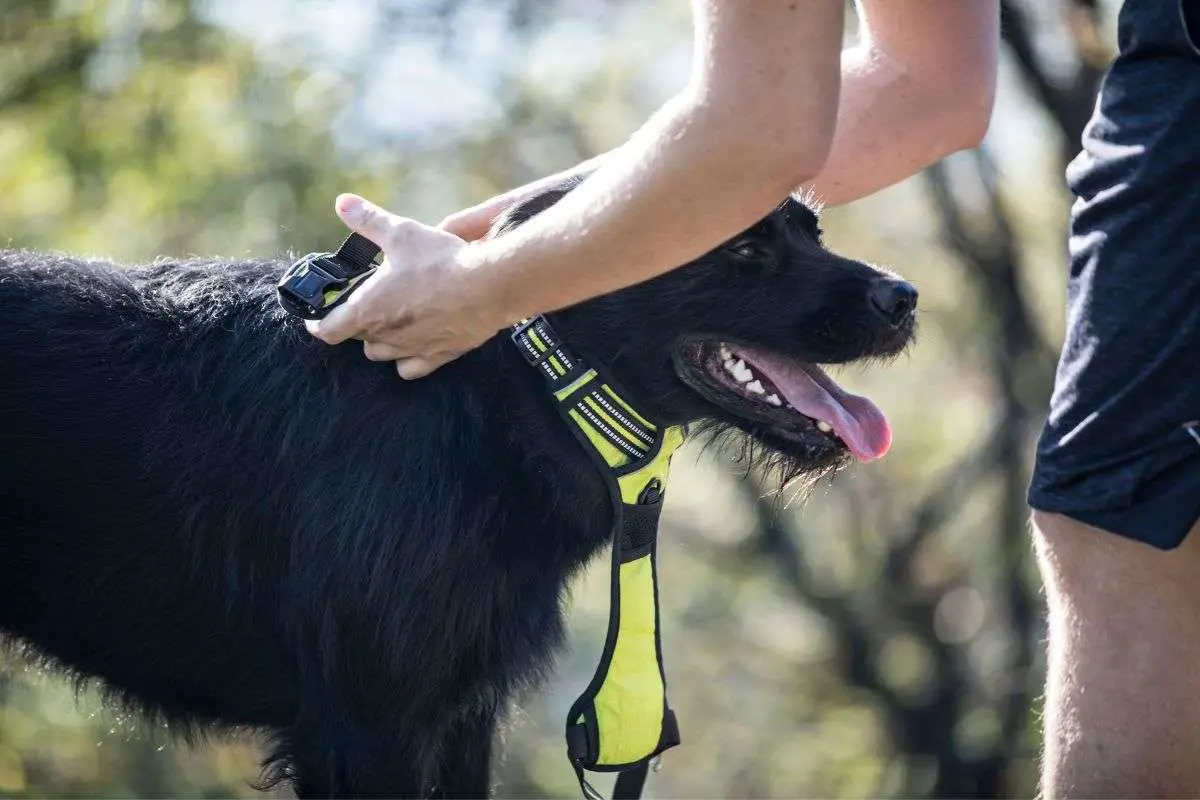
Indossare un'imbracatura con clip frontale
Molti proprietari di cani che vogliono scoraggiare i loro cani dal tirare i guinzagli investirà in un'imbracatura con clip frontale.
Questo tipo di imbracatura è chiamata imbracatura con clip frontale. Ciò è semplicemente dovuto al fatto che il guinzaglio viene agganciato alla parte anteriore dell'imbracatura, che passa sopra il petto del cane.
Tieni presente che alcune imbracature con clip frontale sono costruite in modo simile alle imbracature standard o alle imbracature step-in (vedi sotto).
Il metodo seguente si basa sul design più comune per i cablaggi con clip anteriore. È dotato di un passante attorno alla cassa toracica e di una cinghia sul petto, senza separazione dei fori delle gambe.
- Passo 1: È meglio iniziare dal lato destro quando si indossa un'imbracatura con clip anteriore. Quindi avvicinati al tuo cane dal lato destro e inginocchiati. Il cane può stare in piedi o seduto, purché sia calmo.
- Passo 2: Individua l'anello dell'imbracatura che si adatta attorno alla cassa toracica e passalo sopra la testa del cane. A questo punto, l'anello a cui verrà agganciato il guinzaglio dovrebbe trovarsi sulla parte anteriore del petto del tuo cane.
- Passaggio 3: Successivamente, allaccia la cinghia che va sotto il petto e la pancia del tuo cane.
- Passaggio 4: Prenditi del tempo per assicurarti di non poter far passare la pettorina sopra la testa del tuo cane. Inoltre, puoi inserire comodamente due dita sotto il passante e il cinturino.
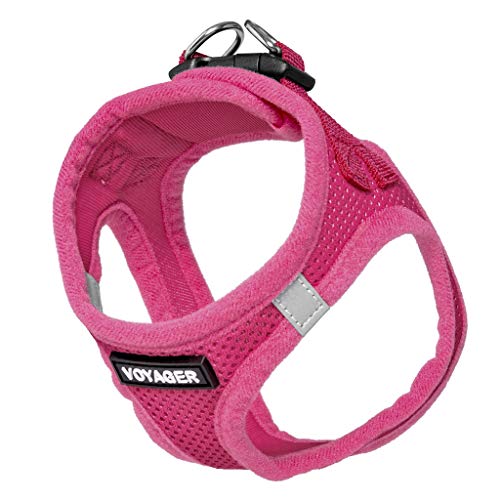
Indossare un'imbracatura step-in
Un'imbracatura step-in è leggermente più facile da montare rispetto a un'imbracatura standard per alcune persone. Assomiglia in qualche modo a un'imbracatura standard, ma invece di essere rettangolari, i fori delle gambe sono triangoli.
- Passo 1: La tua imbracatura dovrà essere pronta affinché il tuo cucciolo possa entrare prima che tu possa fare qualsiasi altra cosa. Stendi l'imbracatura sul pavimento. Le forme triangolari dovrebbero essere visibili e gli anelli a D dovrebbero trovarsi sotto le fibbie.
- Passo 2: La prossima cosa da fare è mettere il tuo cane in posizione. Tenendoli da dietro, incoraggiali a mettere le zampe anteriori nei fori delle gambe triangolari.
- Passaggio 3: Afferrare l'imbracatura da entrambi i lati e agganciare insieme le estremità sulla parte superiore della schiena del cane.
- Passaggio 4: Non dimenticare di controllare che l'imbracatura sia adattata alla taglia corretta. Usa il test con due dita e vedi se riesci a far passare l'imbracatura sopra la testa del cane. Se non puoi, è sicuro da usare.
Imbrigliare un cane – Considerazioni finali
Indipendentemente dal tipo di pettorina che usi per portare a spasso il tuo cane, è importante sapere come indossarla correttamente.
Ci auguriamo che le nostre istruzioni su come indossare le imbracature standard, ad accesso facilitato e con clip anteriore siano state utili. Ricordati di controllare la vestibilità della pettorina del tuo cane prima di uscire per la passeggiata.
Non dimenticare di farlo treno al guinzaglio anche!
FAQ
Se l'imbracatura si adatta correttamente, un cane dovrebbe essere in grado di indossarla per tutto il giorno senza alcun disagio. Tuttavia, dovresti sempre togliere l'imbracatura al tuo cane di notte e ogni volta che lo lasci incustodito.
È molto meno probabile che un cane si provochi dolore o lesioni tirando un'imbracatura rispetto a quando tira un collare. Detto questo, è fondamentale che l'imbracatura sia ben imbottita e si adatti correttamente per eliminare il rischio di lesioni al torace.
Imbracature per cani mal costruite o inadatte possono limitare il movimento delle spalle.
Questo alla fine può portare a dolore e condizioni mediche come l'artrite e la borsite. Per questo motivo, è importante verificare che l'imbracatura non sia troppo stretta prima di utilizzarla.
Post correlati:
 I cani possono mangiare l'edamame? I fagioli di edamame sono sicuri per i cani? – Risposto
 Quanto tempo vivono le pulci sui tappeti? Come sbarazzarsi di loro?
 Posso dare al mio cane Calpol? Calpol è sicuro per cani e gatti?
 Perché il mio cane dorme sopra di me?
 Come rimuovere placca e tartaro dai denti di un cane